Recently a few bloggers were challeneged by Homeright to tackle a laminate storage unit and make it our own.

I decided to tackle it and knew I could knock it out in no time at all.
How hard could this little piece be? I would soon find out…..insert evil laugh.
I knew I wanted to go dark with it and had been craving painting in green. I grabbed a paint sample at Lowes and had them color match it with Valspar’s Chalk Paint. I have heard good things about it and since this is only my second project to do in chalk paint (here is my first), I thought it wouldn’t hurt to try another brand.
Directions:
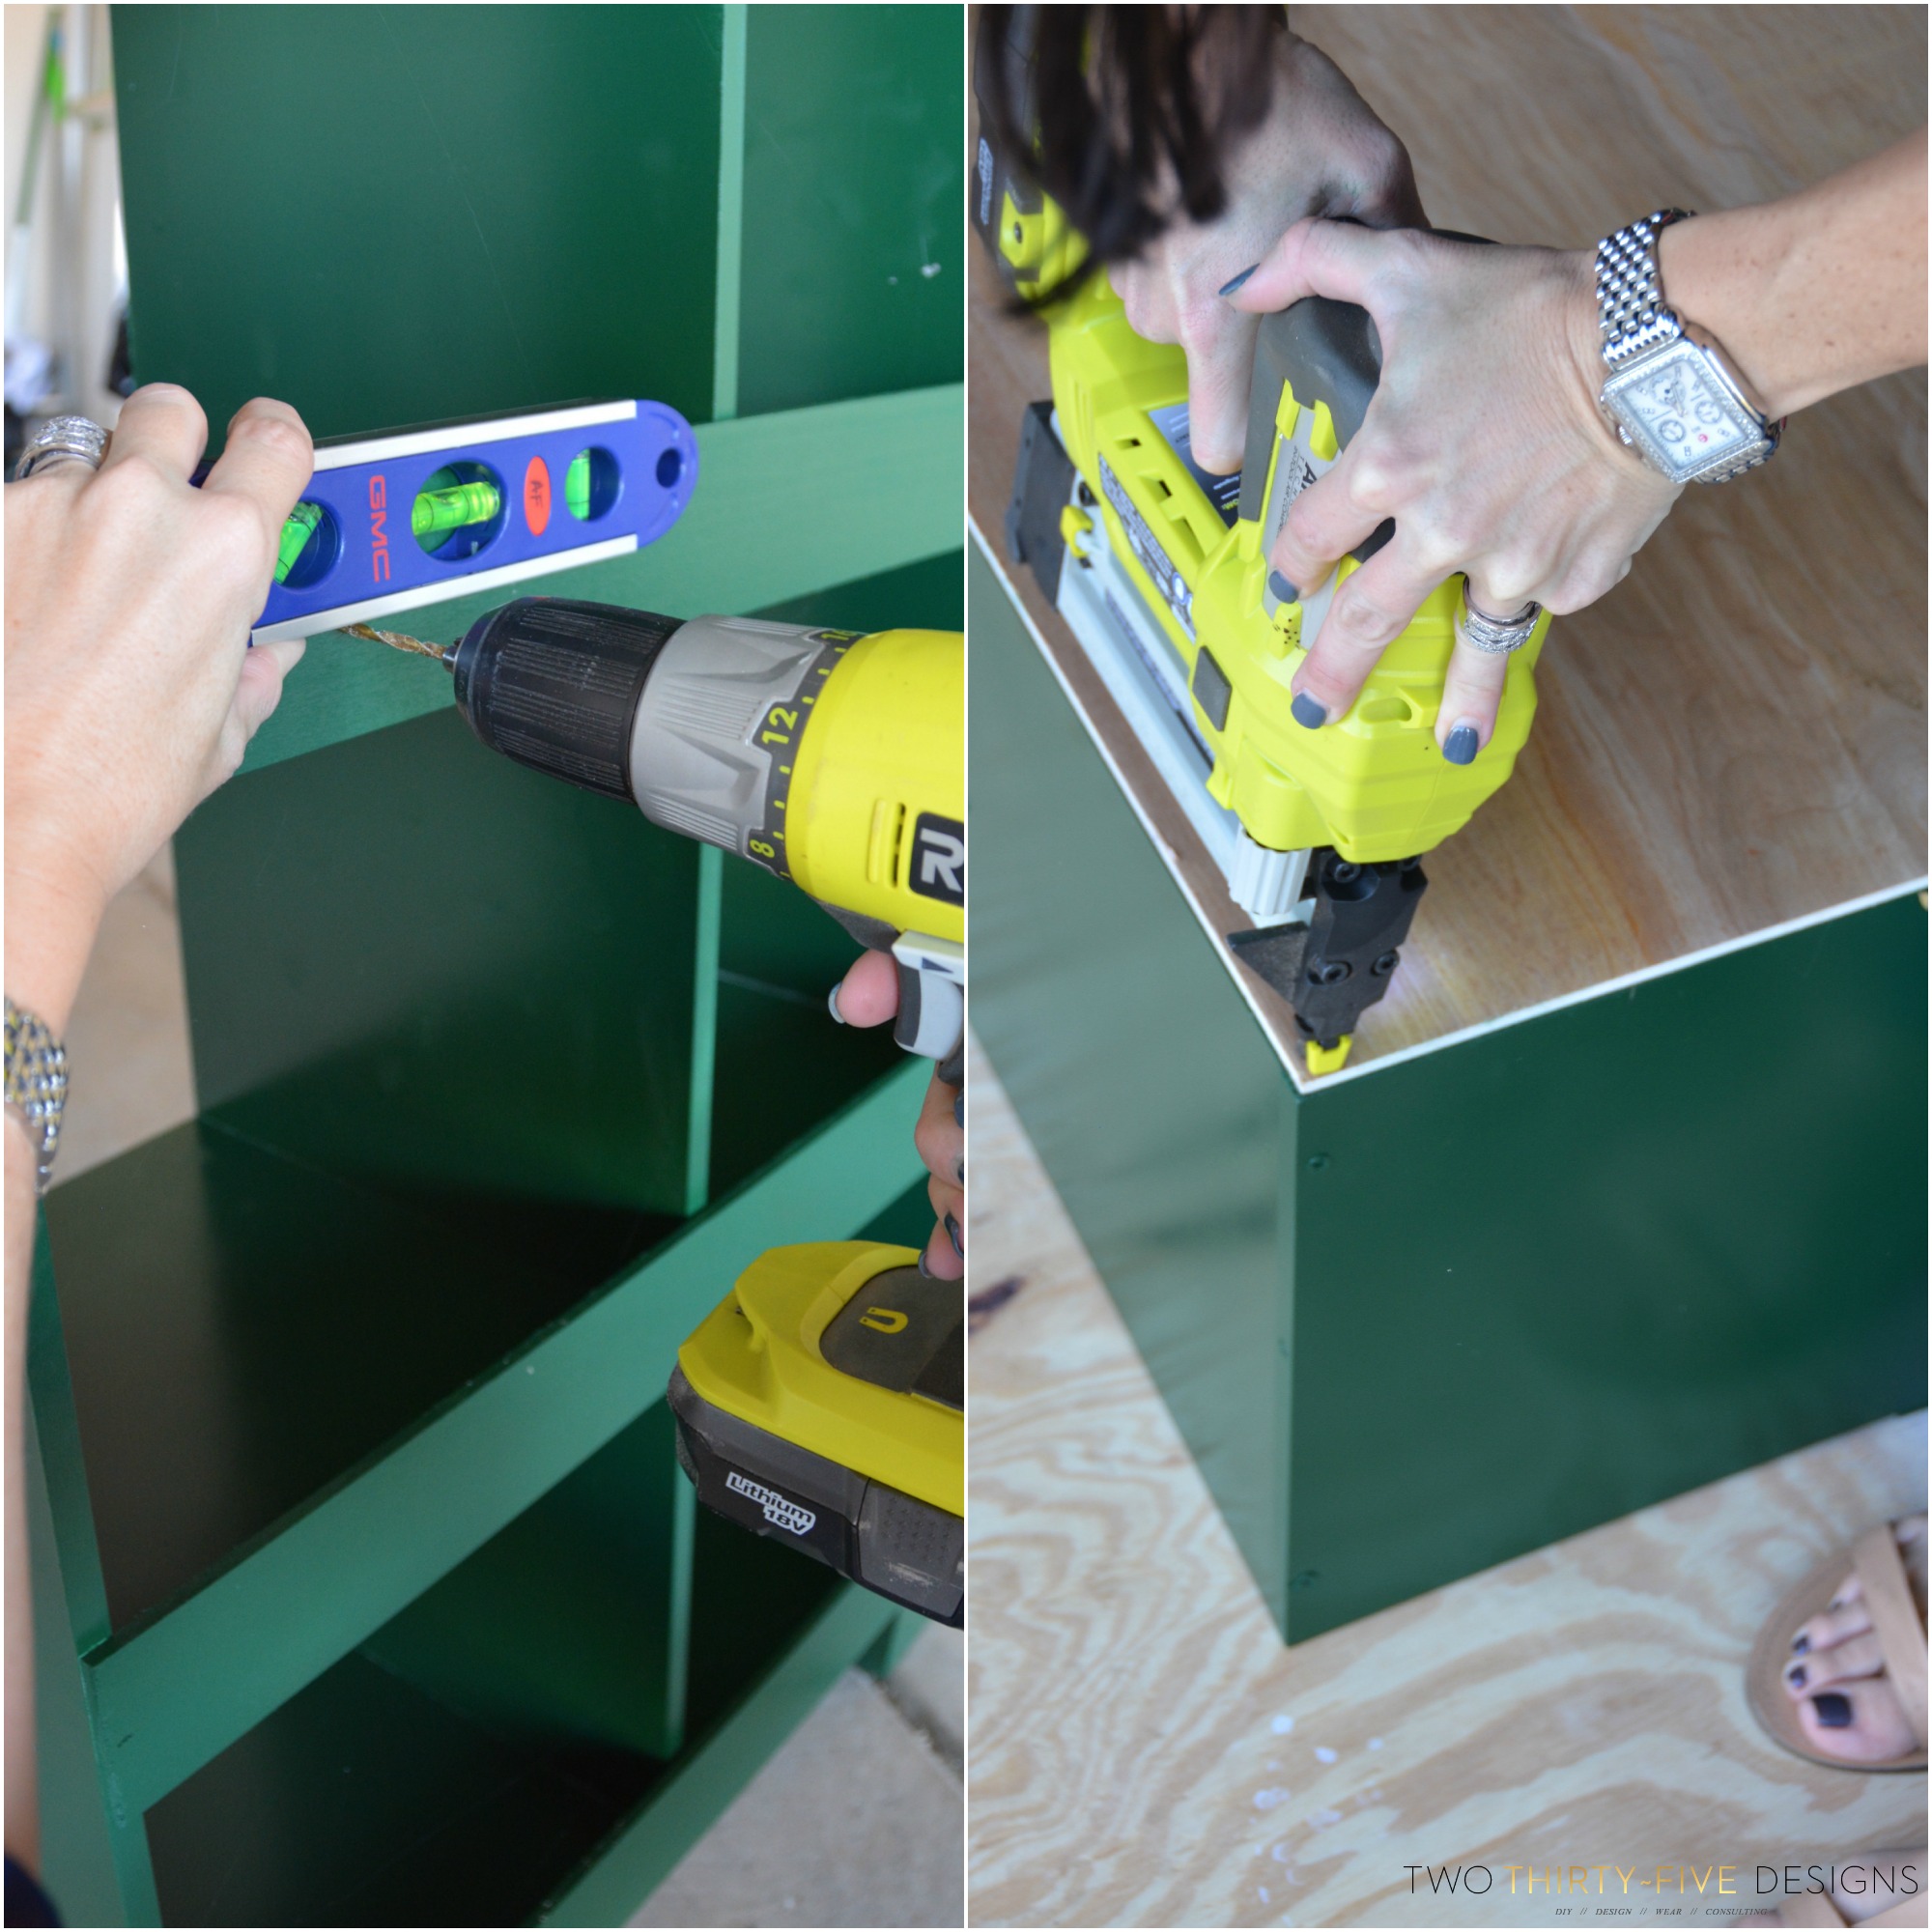
1. Assemble the unit. I opted to leave the back pieces off.
2. Sand entire piece. I was a bit worried about the paint sticking and I had good reason to be.
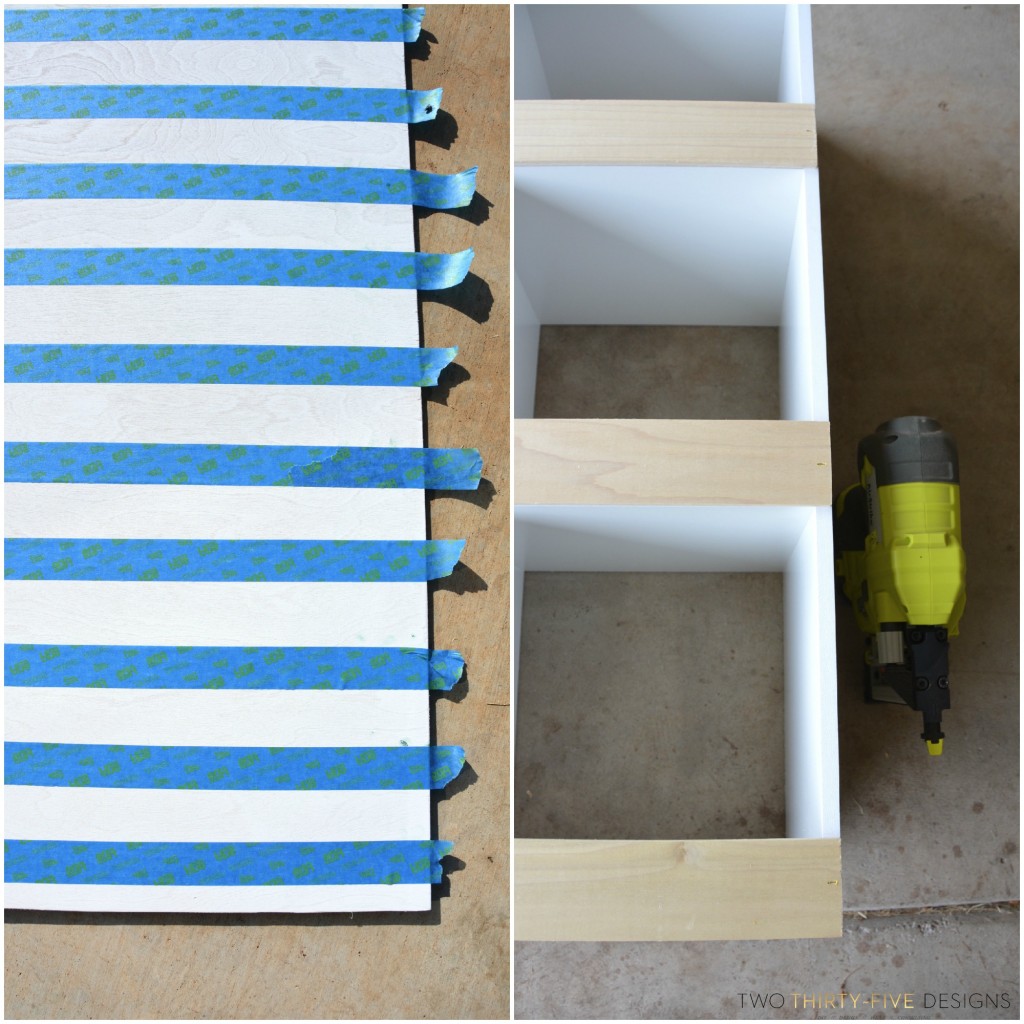
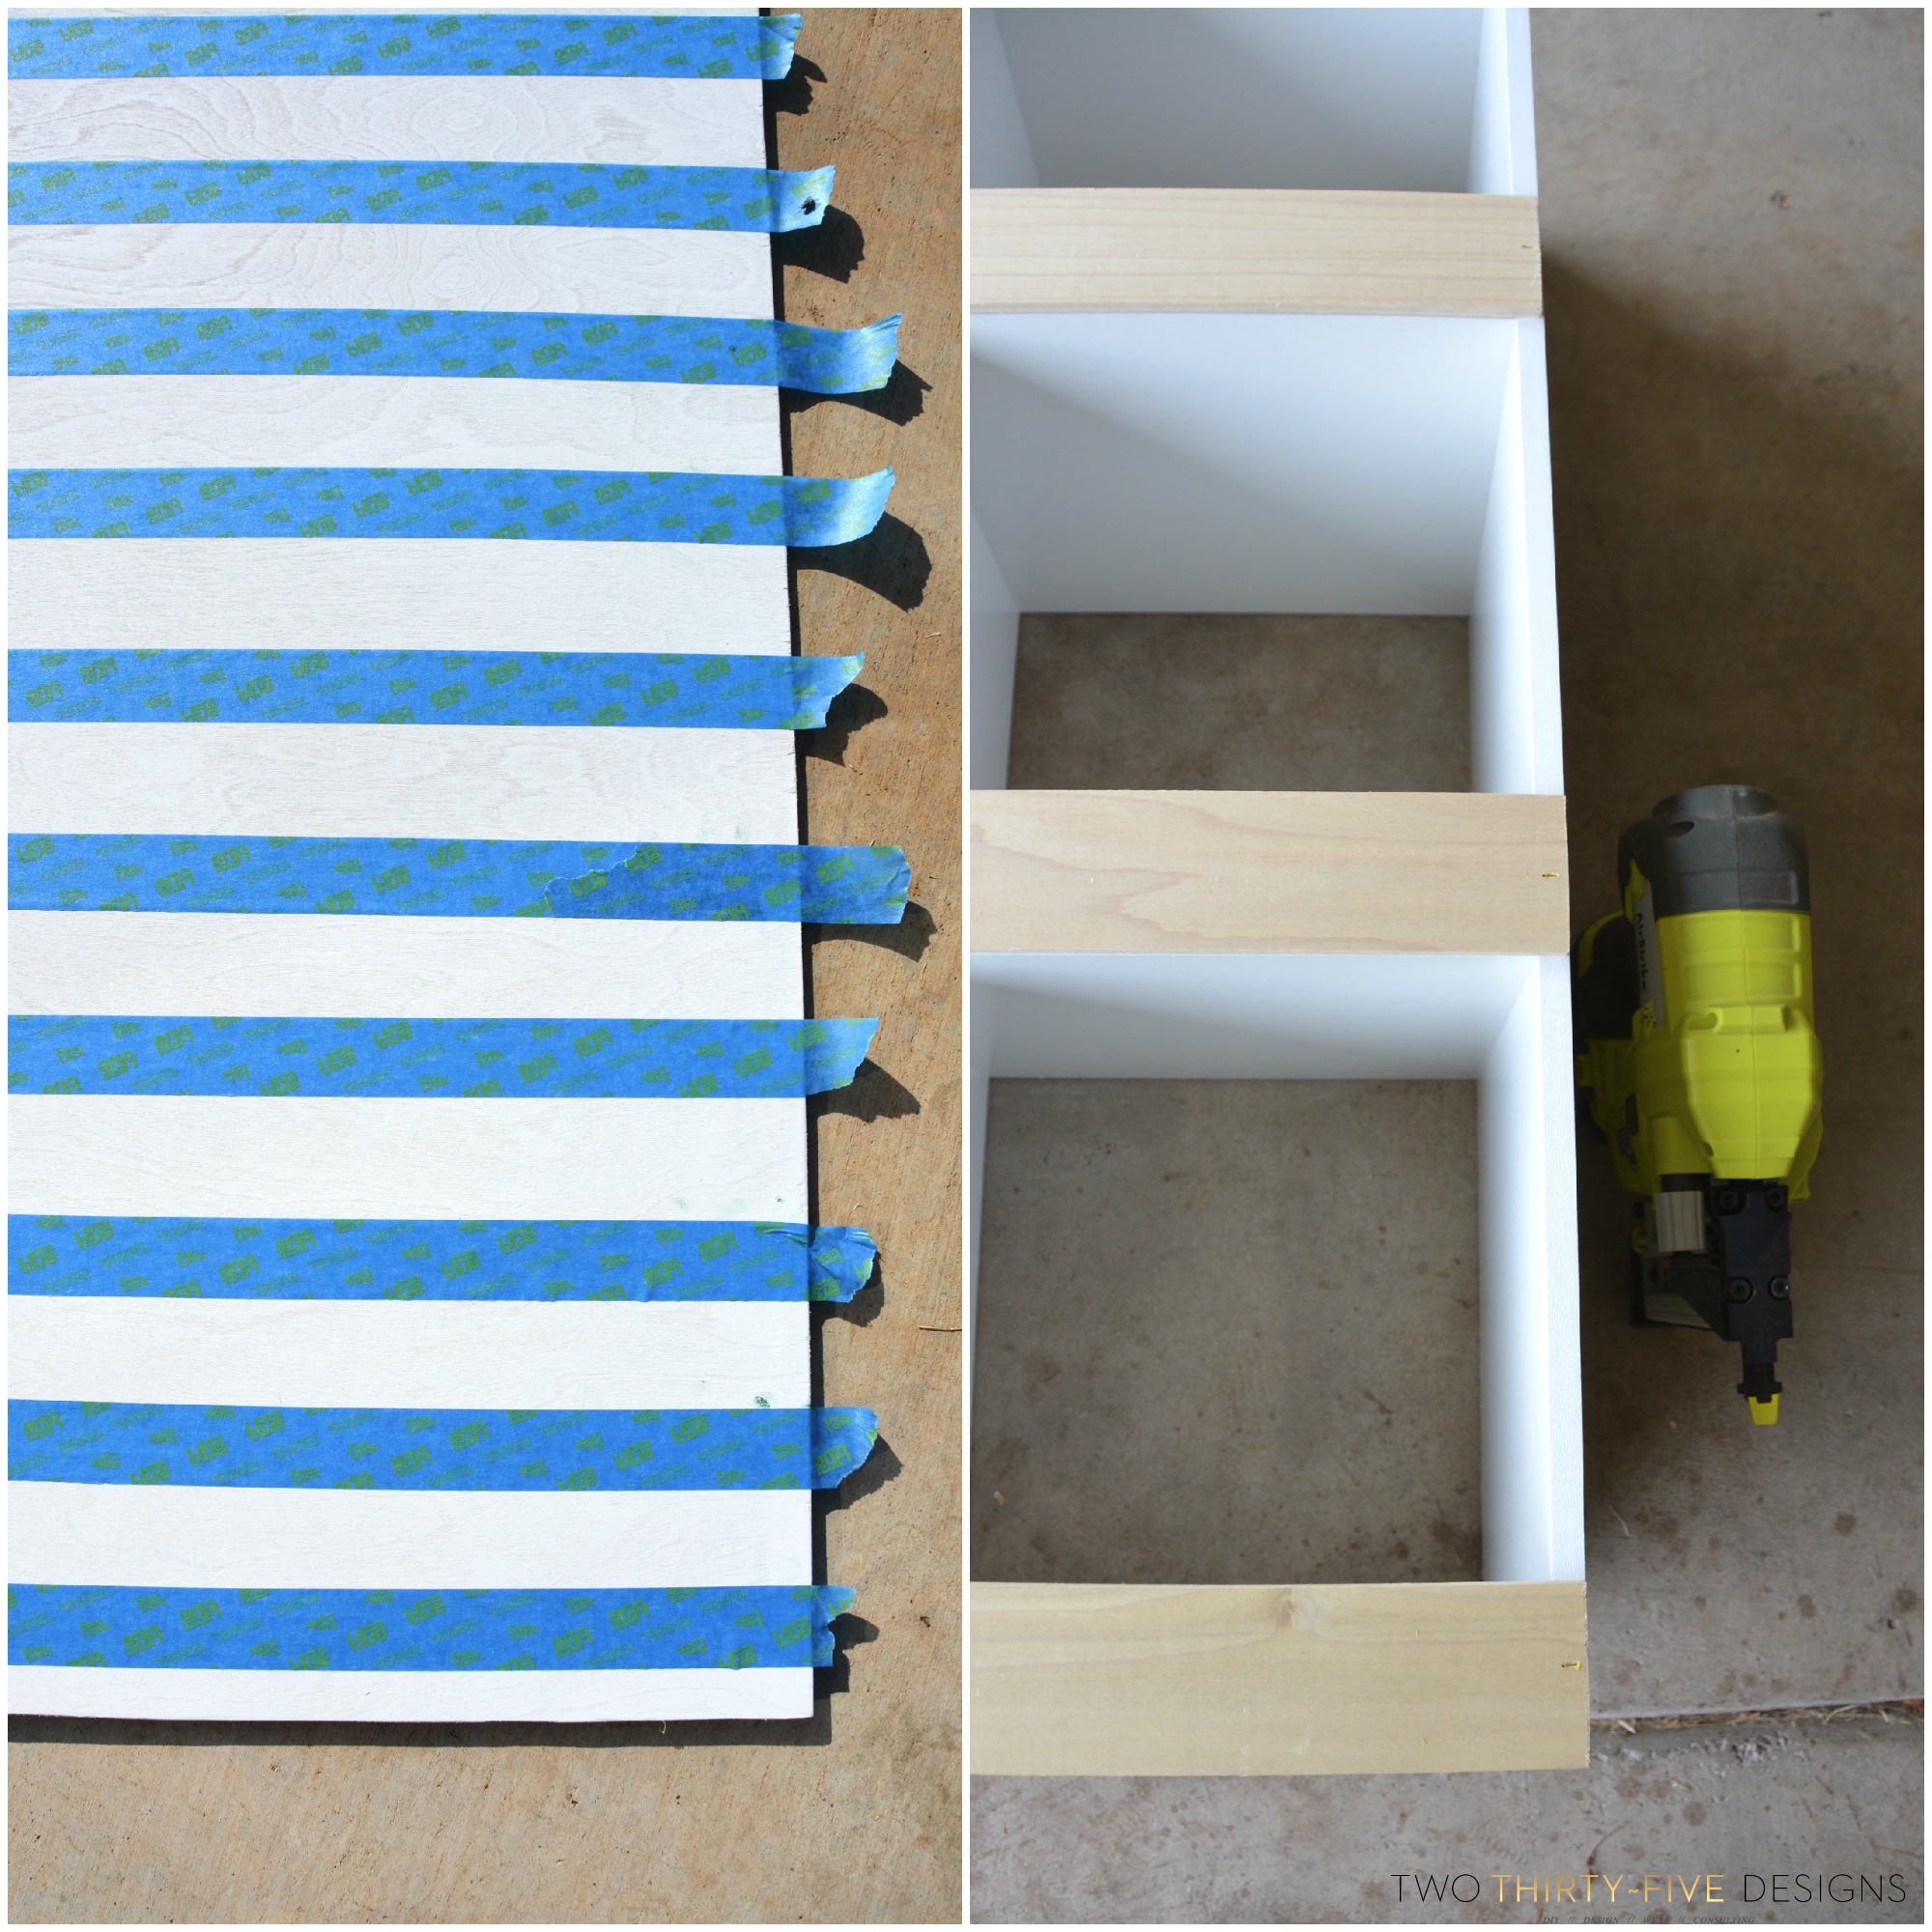
3. I took a piece of 4×4 underlayment and cut it to fit the back. Sprayed a quick coat of white to coat it.
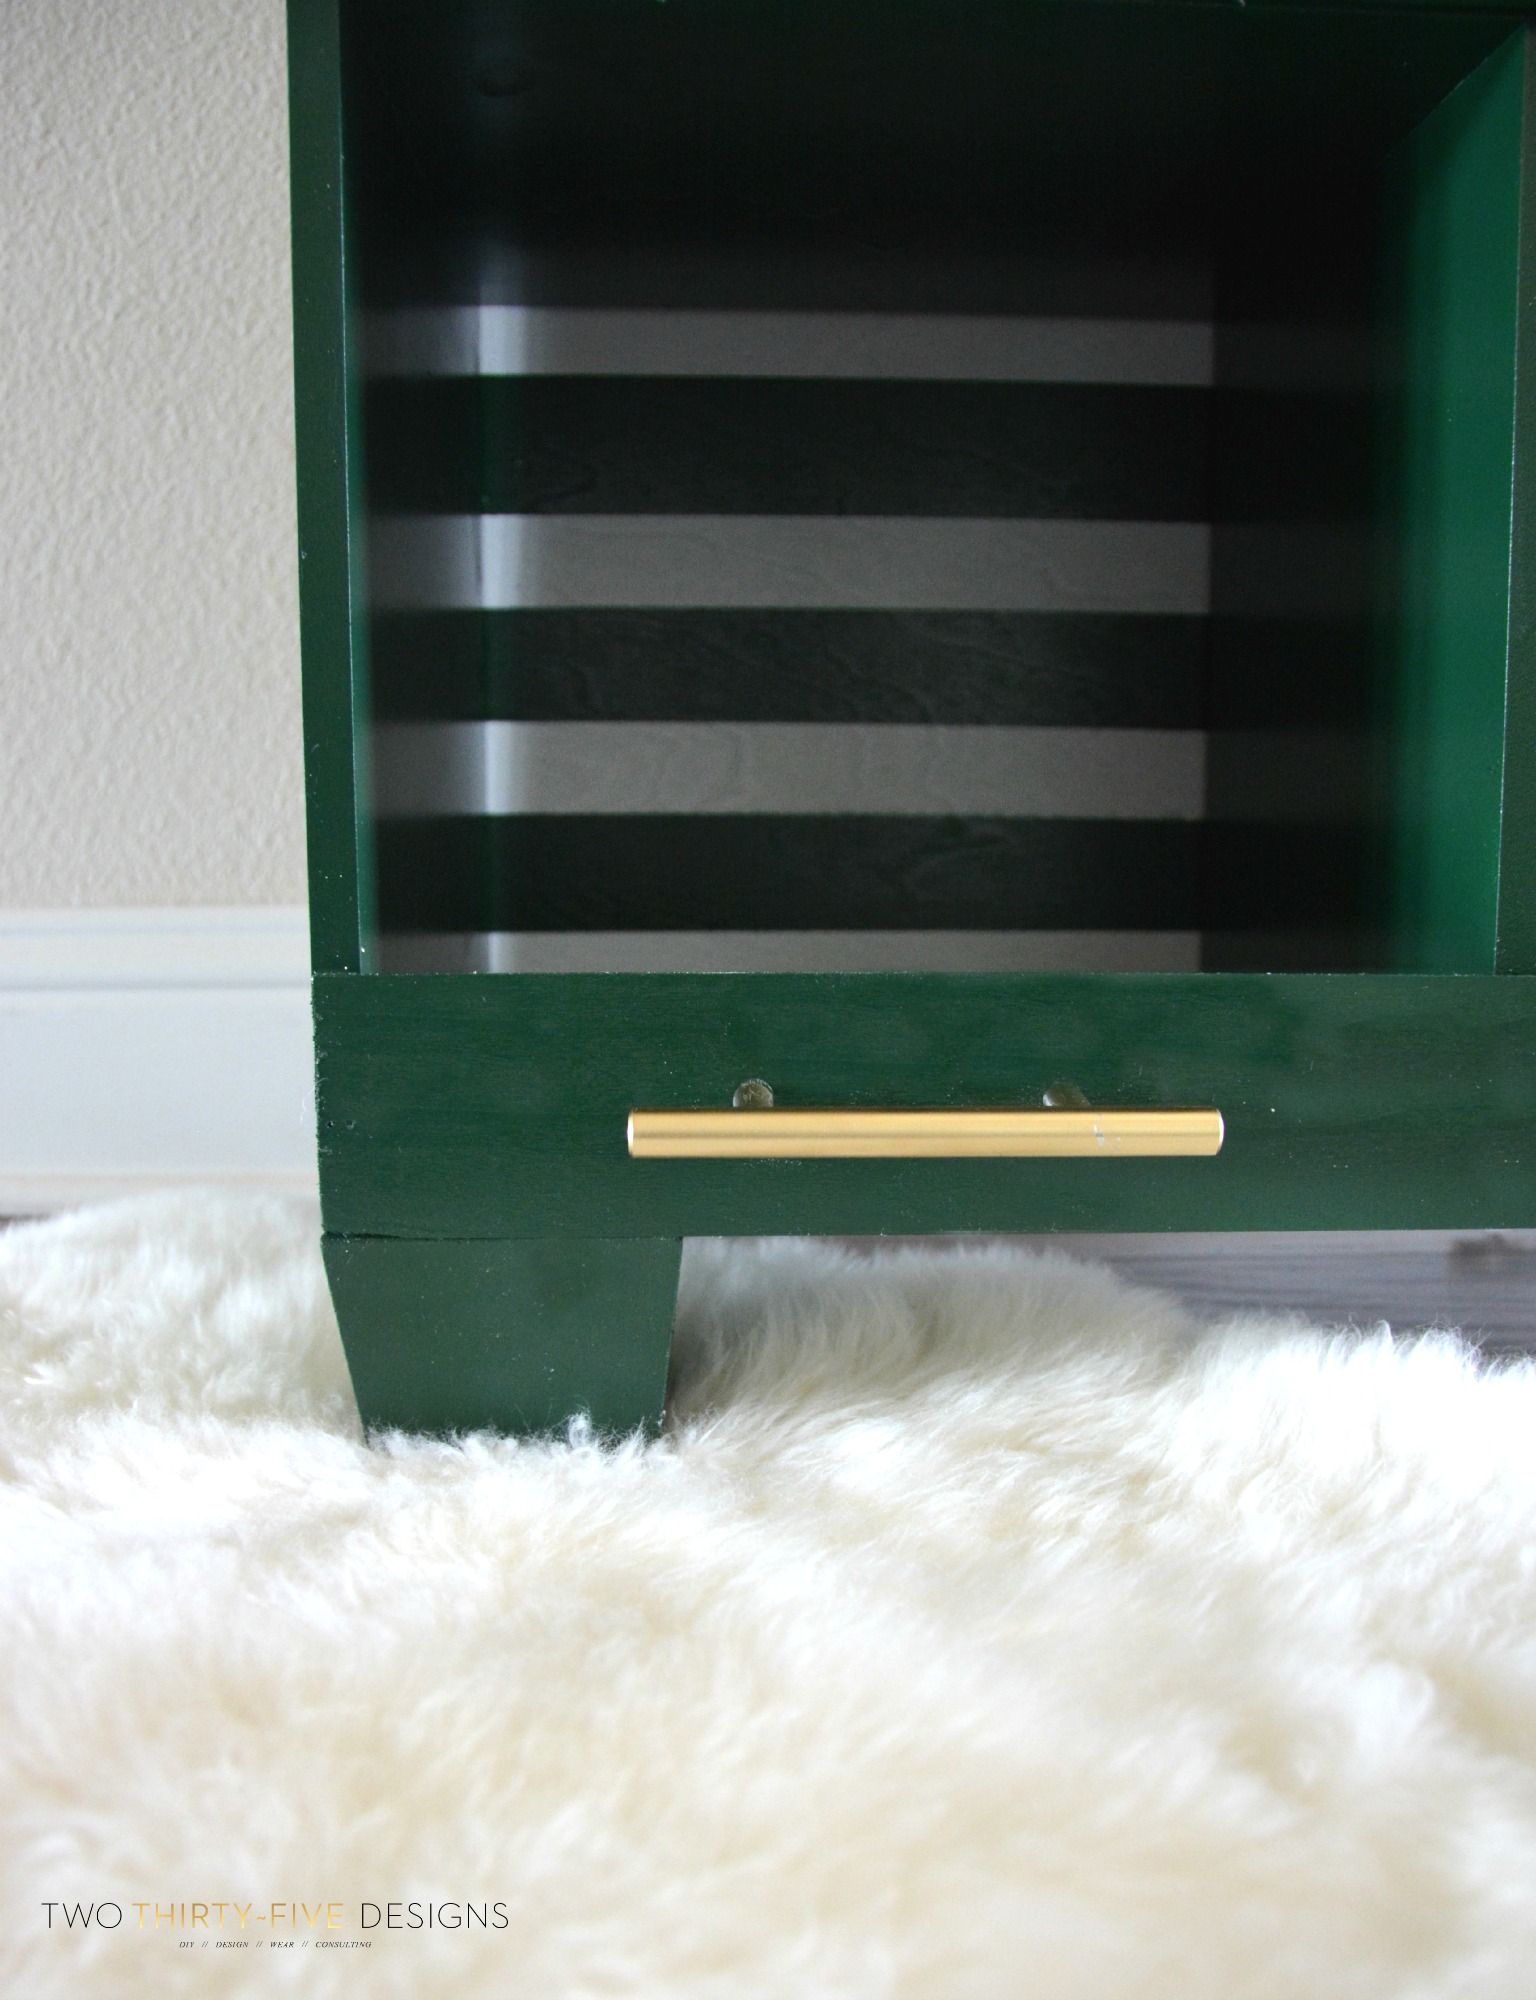
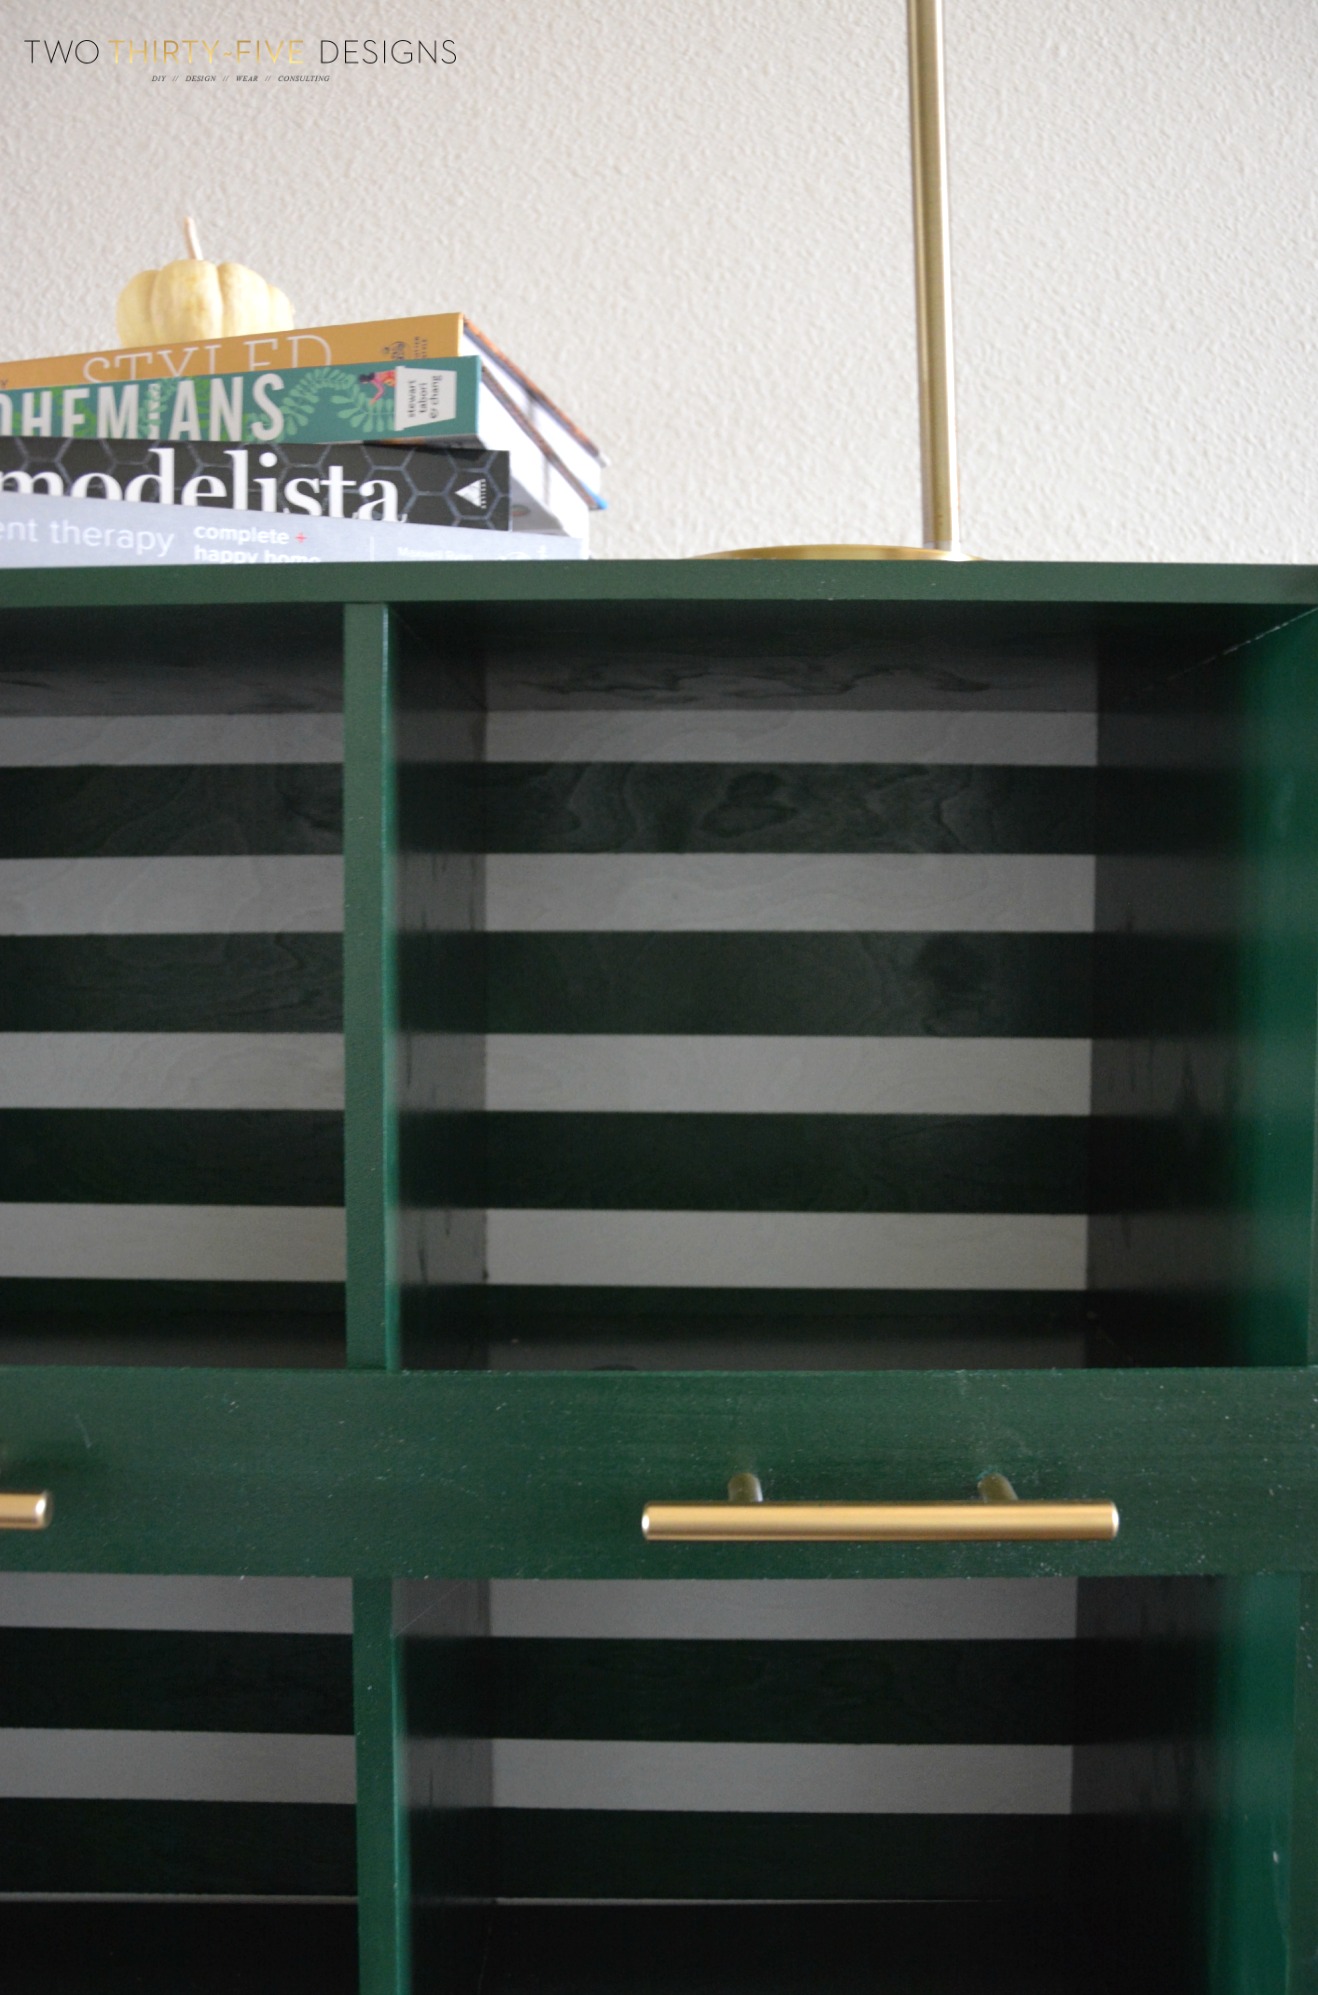
4. While the white paint dried, I cut strips from the underlayment and attached with my Airstrike to the front, across each shelf. I went back and taped off the backing to make stripes.
5. I added feet to the bottom to lift it off of the ground.
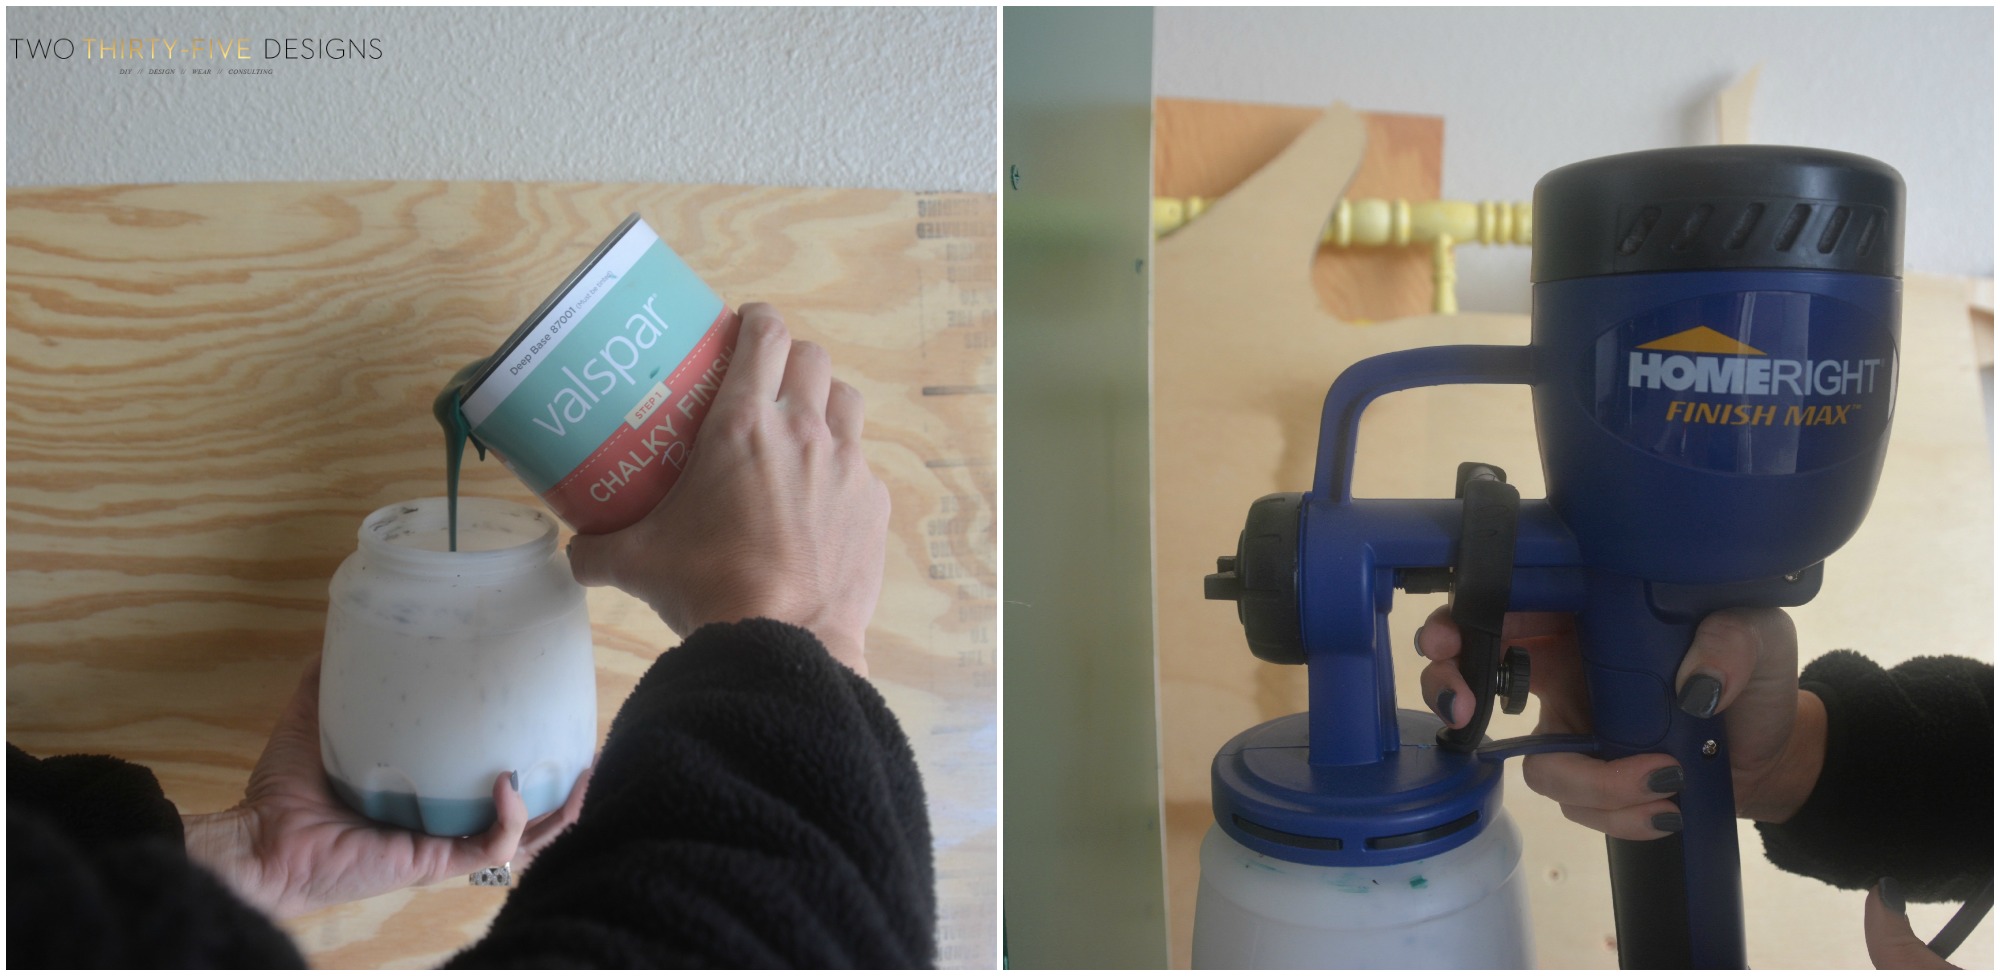
6. Filled up my Finish Max with my paint and sprayed the back side and began to tackle the unit.
Again and again.
And again.
And so on.
This paint ran like it had just finish training for a marathon. And when it decided to take a break and chill, it would turn into a complete flake.
I had many face palms through out this.
We finally had a day that it warmed up a bit and the sun was out. I put it in the backyard, sprayed again and let it set all day.
Then sealed it. I was too afraid of breathing and it running for the hills again. I didn’t use the wax, I was a little to worried at this point, so I opted for a poly.
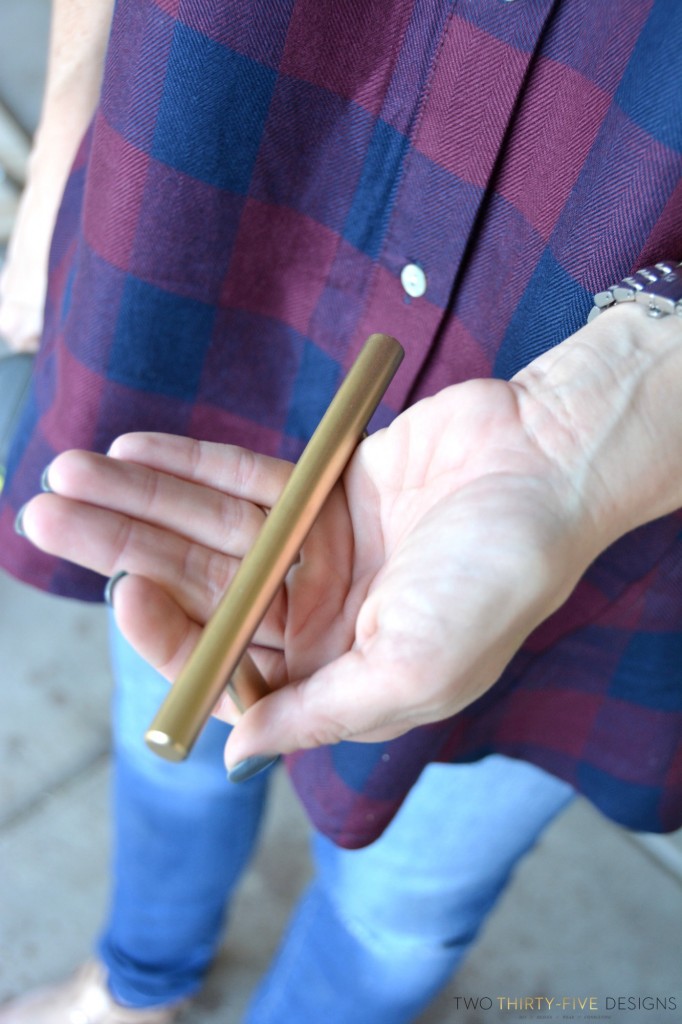
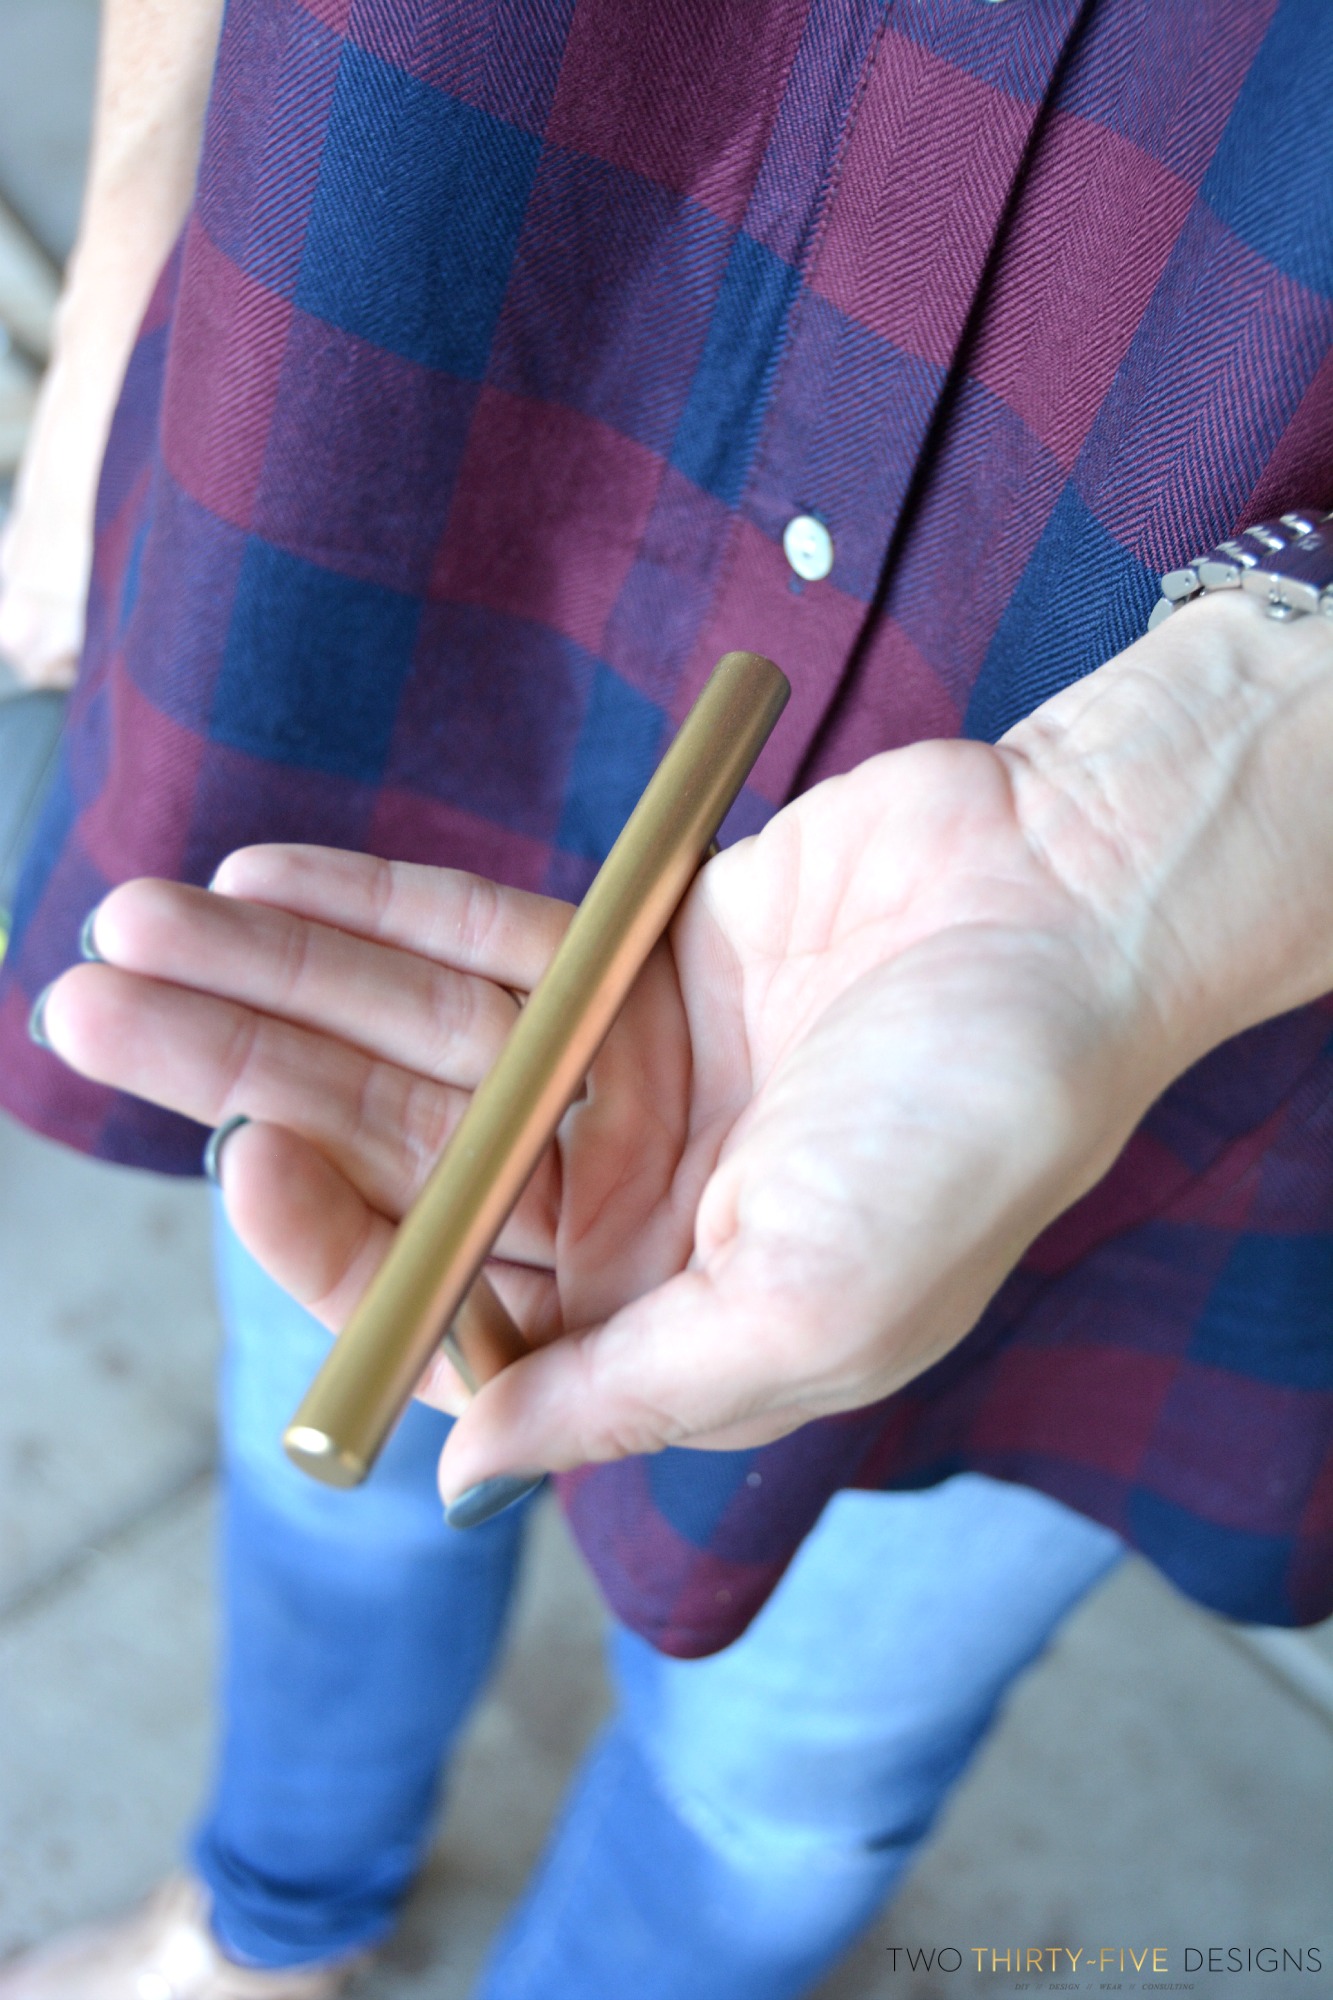
7. While it did it’s thing, I sprayed a few handles gold and fell.in.love with them. I’m always a sucker for a little bit of eye catching gold on a piece.
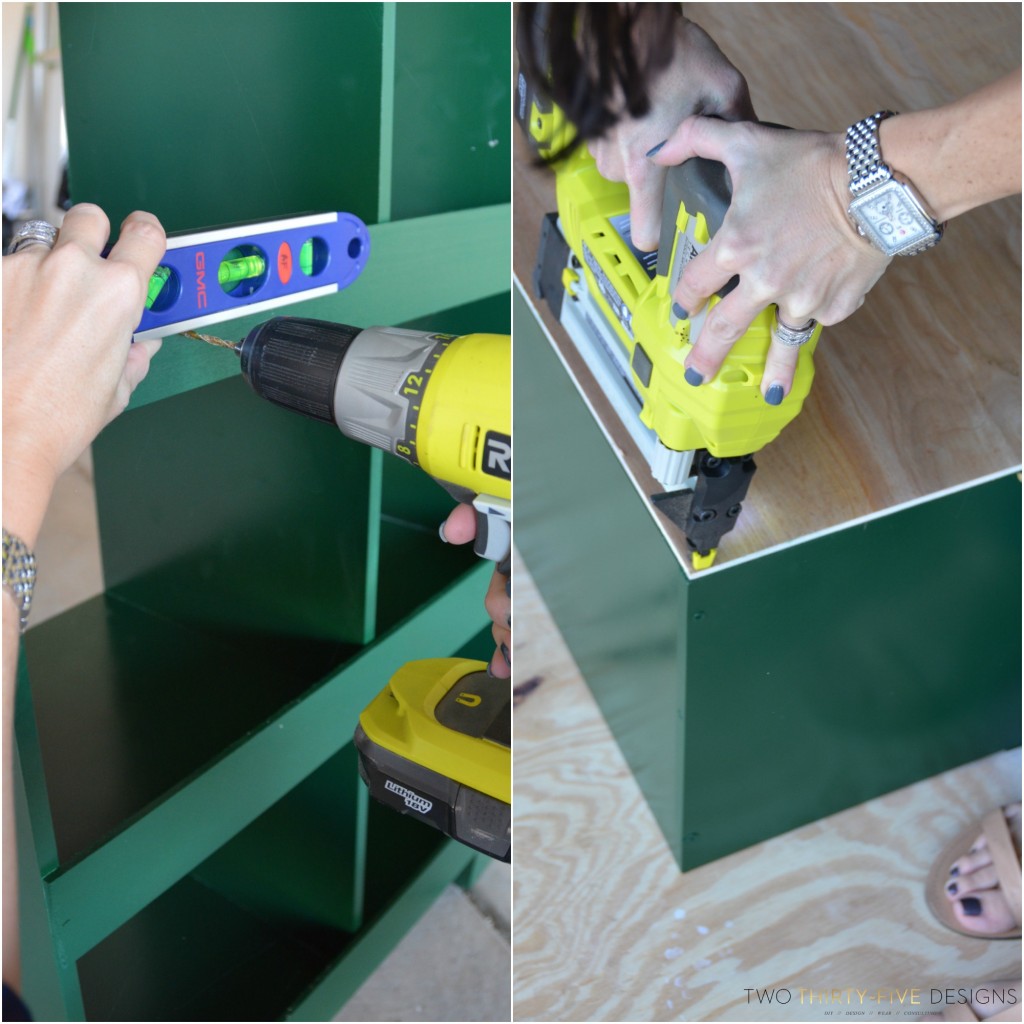
8. Using my drill bit, I made holes for the gold pulls.
9. Flipped the piece over and attached the backing.
10. Flip it back over and add the handles.
(I did it in this order so that the handles wouldn’t get scratched or mess up the wooden front.
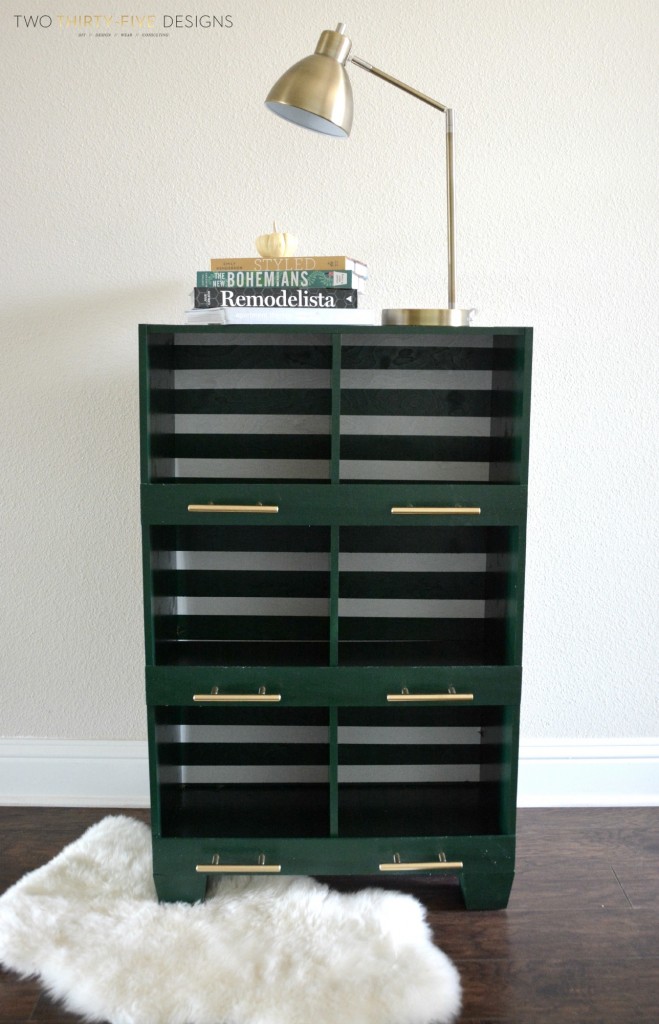
I really dig how it all turned out. Even though it might have been one of the most teeth clenching painting jobs I have tackled in a while.
I’m thinking it was a combo of the type of laminate, chalk paint and sprayer.
I love my Finish Max, and people seem to really like the paint……so who knows.
I do love how it all turned out 🙂