I am going to step away from the Parade of Homes posting for today, but will be back for a few more tutorials soon!
{You can find my entire Parade of Homes series by searching ‘Parade of Homes’ in the search box to the right}
I am one of the biggest advocates for making your own art. I have been posting about it numerous times here and other places and I know I am not the only one who thinks this. Others such as Danielle from Danielle Oakey Interiors, Kristin from The Hunted Interior and Lindsay from Makely, make a ton of their own art. And those girls are beyond fabulous, go and check them out.
It’s affordable, you get the size you want/need, the exact color and pattern you had your heart set on, there is no settling for something that’s just okay, if you mess up or want to change things up you can easily do so, and you have a one of a kind piece.
I constantly hear over and over when I talk about this:
‘I’m not talented’
‘I’m not an artist’
‘I have bad handwriting so that means I can’t paint’
‘I can hardly drive let alone paint a canvas’
seriously….
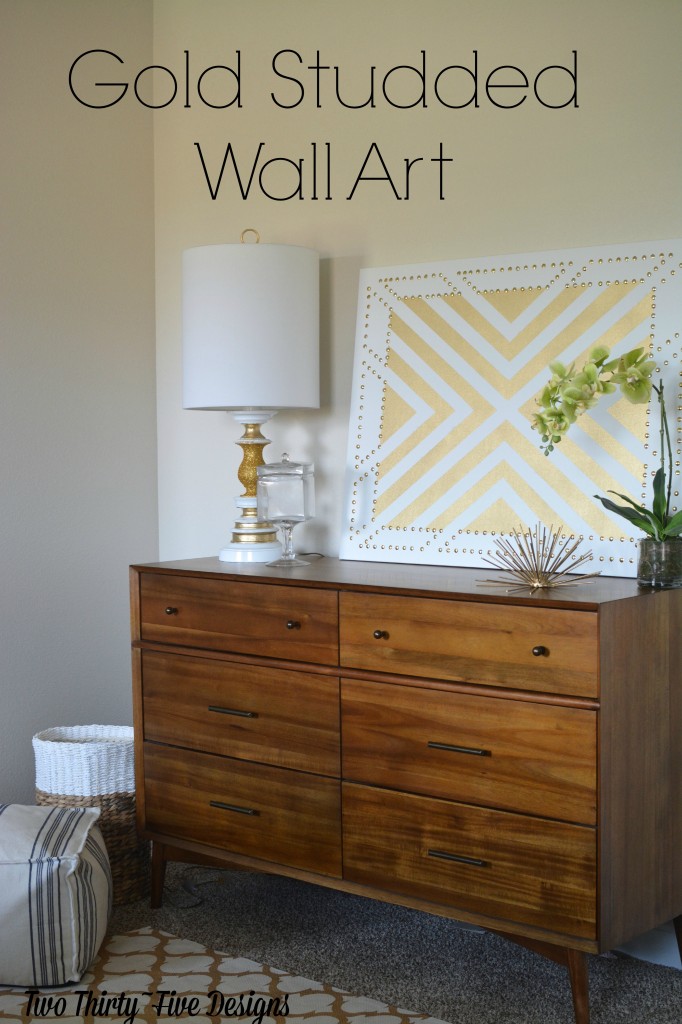
Today’s post was one of the easiest, fastest canvases to date. There was no blending and I didn’t even break out a brush.
Materials:
Canvas – Whatever size you need
Metallic Gold Spray Paint
Gold Thumbtacks – I used about 4 small boxes
Painters Tape
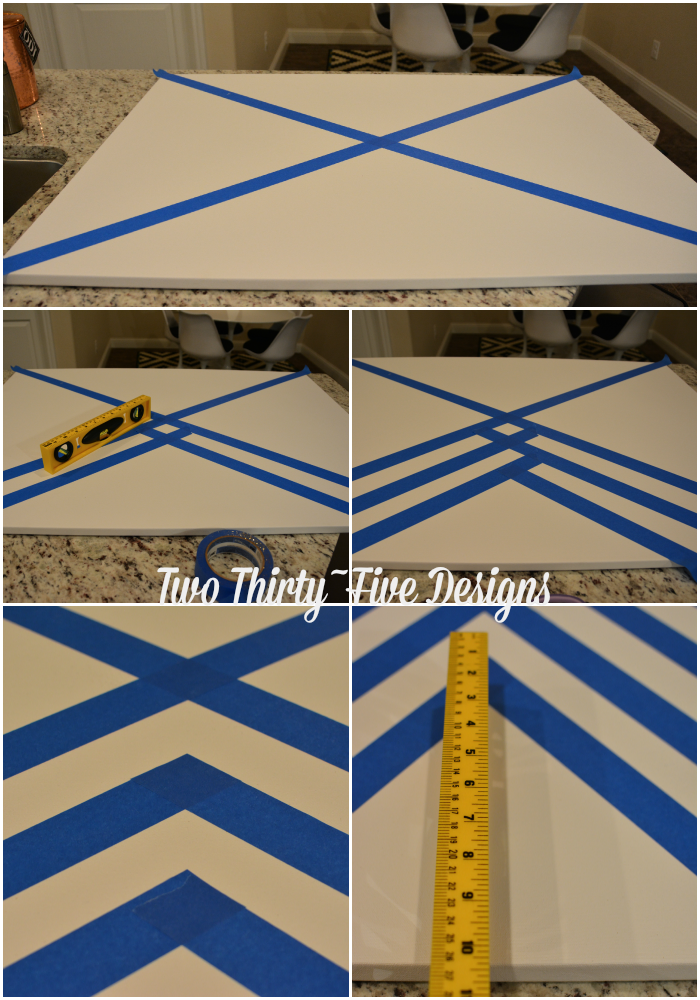
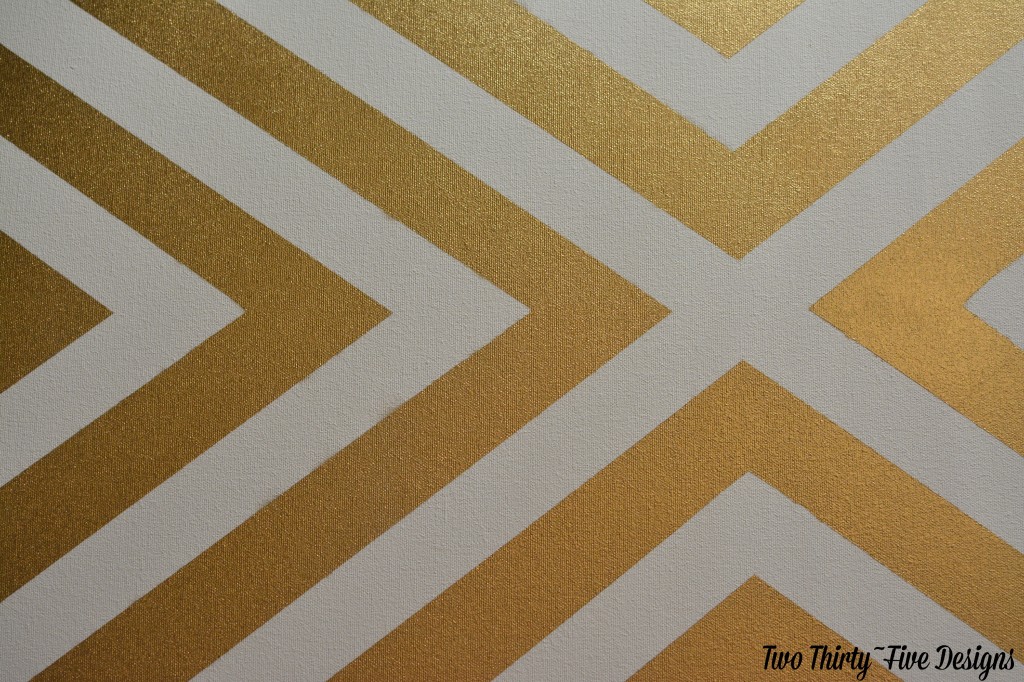
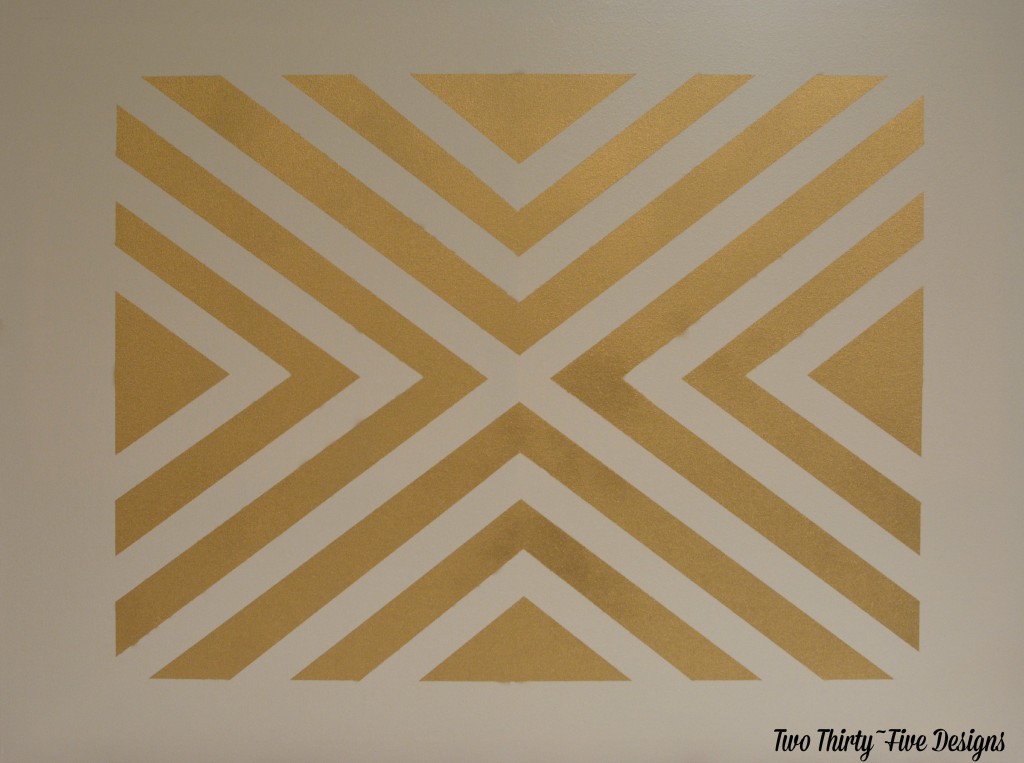
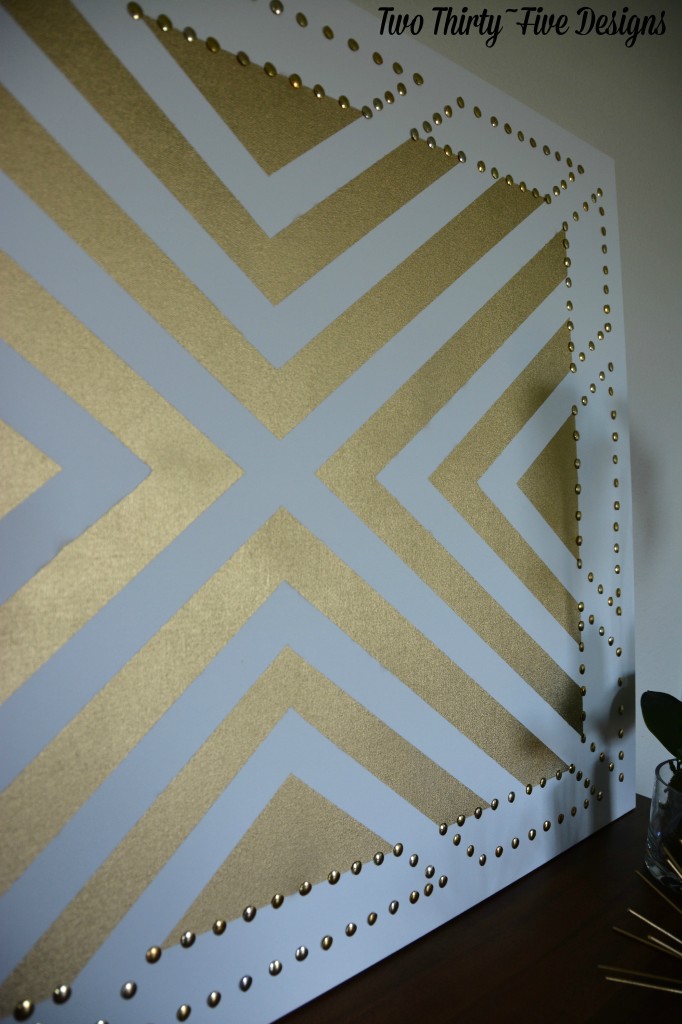
1. Starting at a corner, run a long piece of tape diagonally to the other side. Repeat, making an X.
2. Working in each triangle, run pieces of tape diagonally, working your way down. Don’t fully press tape down. I spaced mine 1 1/2″ apart. You will run four pieces of tape, making two sets of lines. Repeat this for each triangle section.
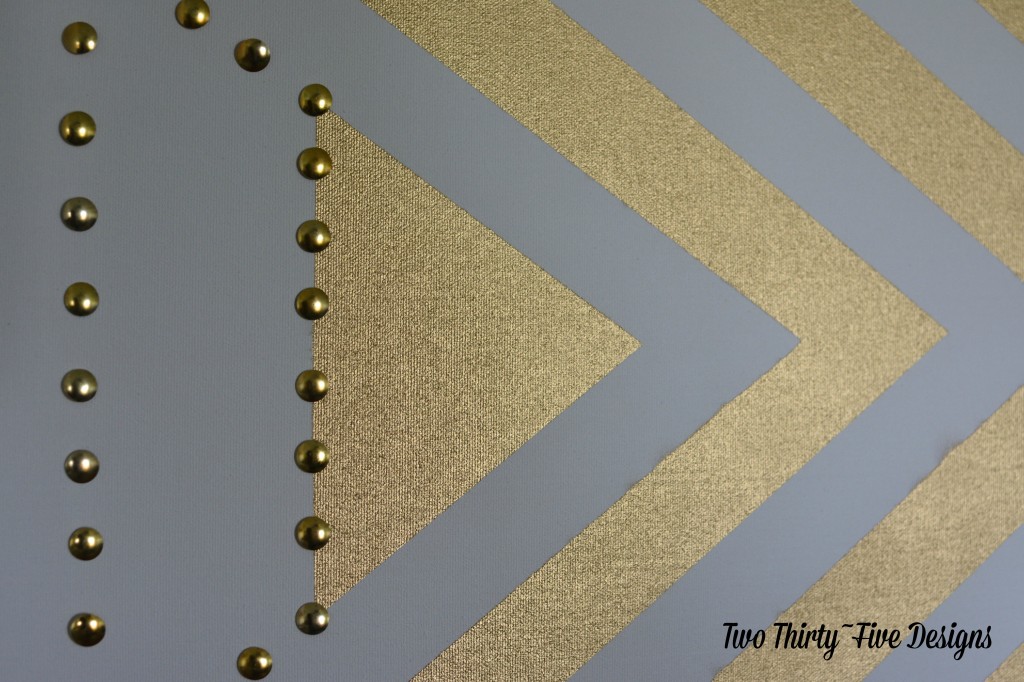
3. Lift up each ‘point’ on the triangles and trim excess tape to make a perfect point. Smooth tape down.
4. I wanted to leave a gap around the edges for the thumbtacks, so I measured half-way down from the bottom point, to the bottom of the canvas.
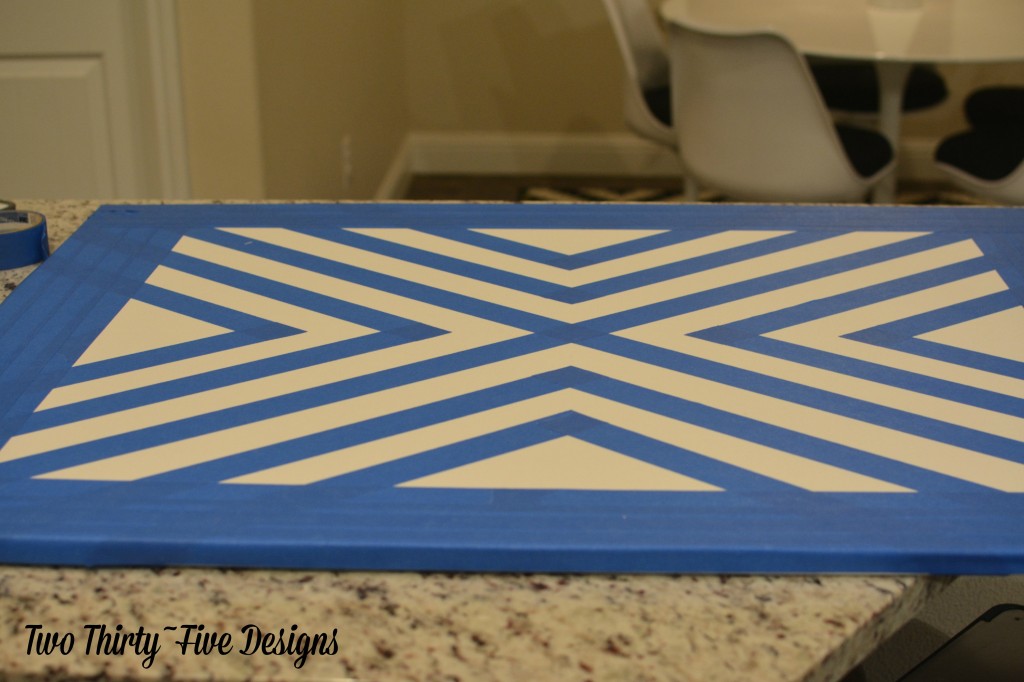
Run the tape around all sides, overlapping each on and smooth down.
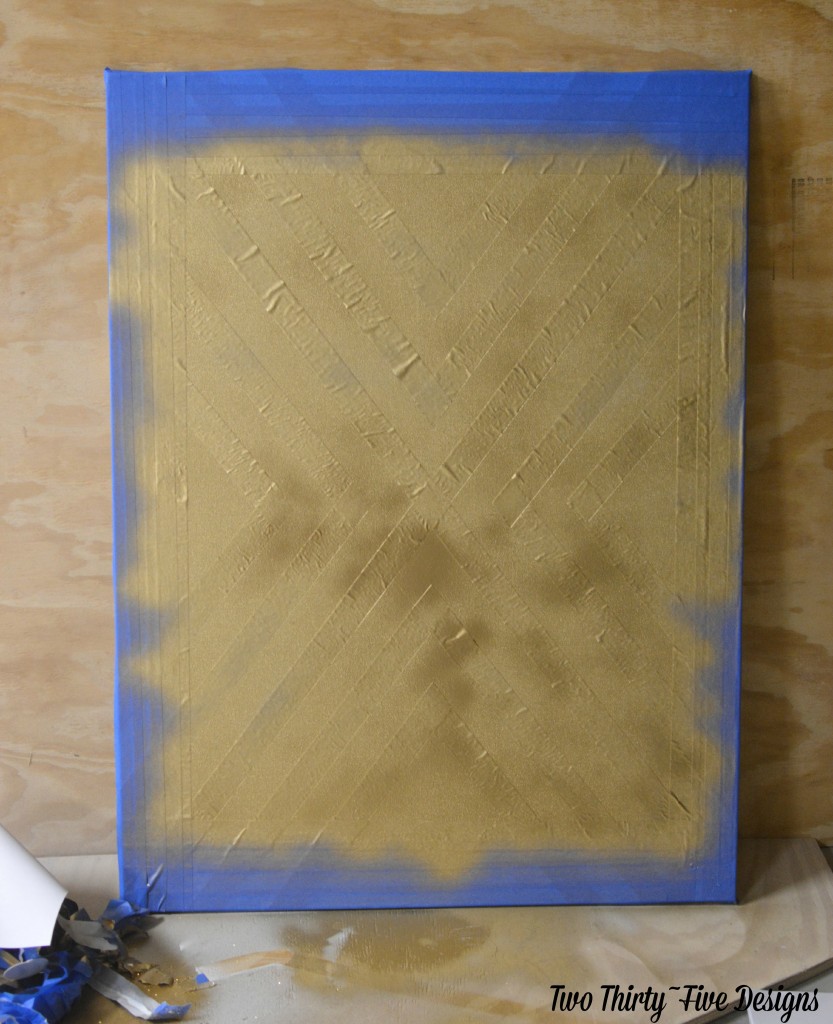
In a well ventilated area, evenly spray on two coats of paint, but do not saturate. Tape will begin to lift if it gets too wet.
I always get super impatient and rip tape immediately off. The paint dried crazy fast.
Ack….. I love it.
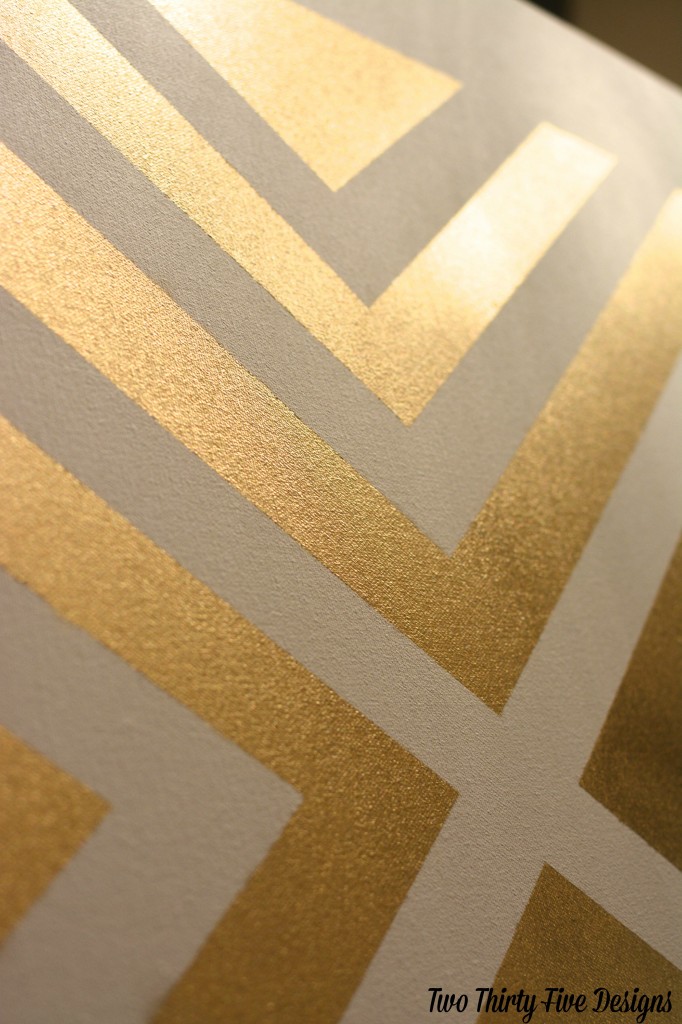
Let it dry over night and get out your tape and thumb tacks.

I ran the tape around the outer edge of the canvas, it saved time having to measure a specific width by just going by the width of the tape.
Next, I made the tape ‘pick up where it left off, and ran it in the same exact pattern as if it had never stopped. BUT I ran it every other line, except for the middle (see above).
From there, I used the tape as my guide, started in the corners and pressed the thumbtacks in and spaced them a finger width apart.
And I have insanely exciting news!
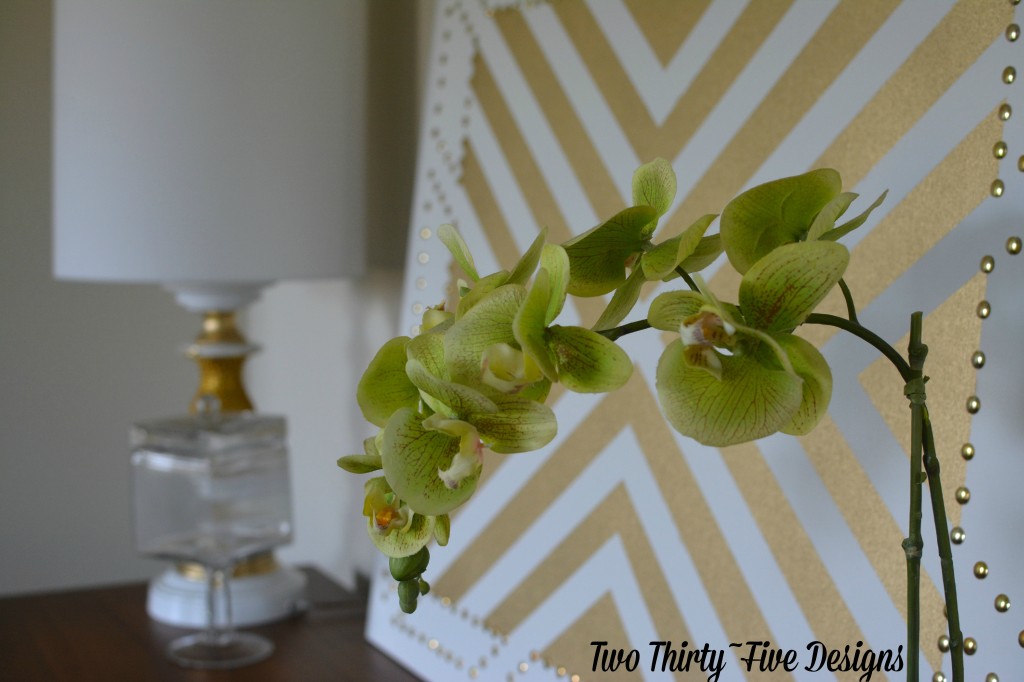
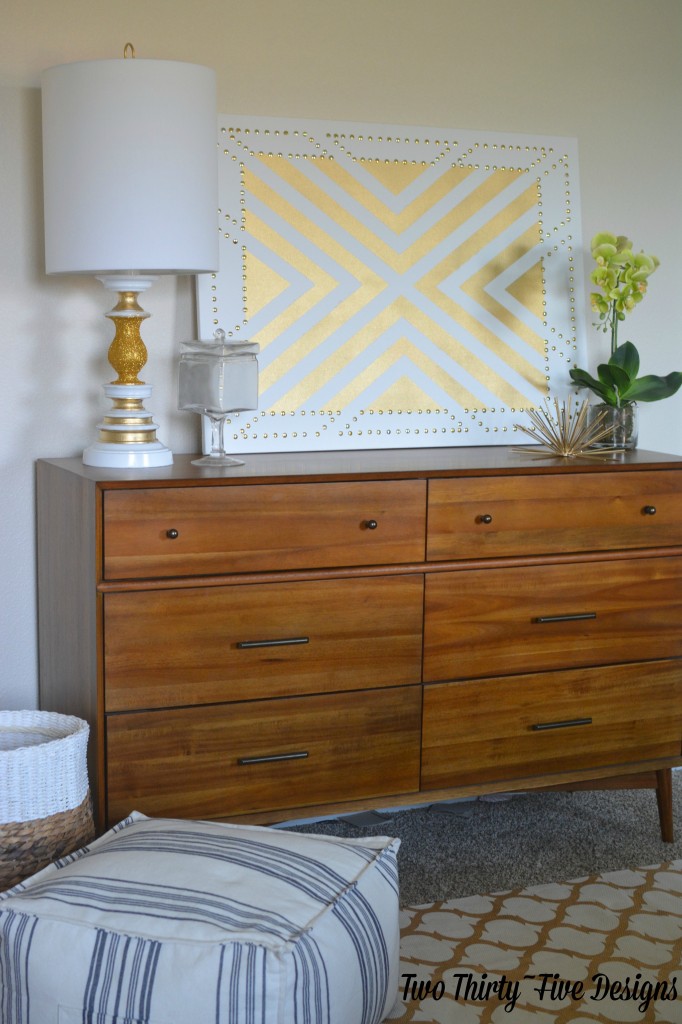
Starting today, I am the DIY Contributor over at All Things Thrifty! I have followed Brooke and admired her for a long time and could not be more ecstatic about it. My post was on my Modern Gold and White Lamp that is pictured with the Studded Wall Art. You guys have got to check out that tutorial.
If you came from All Things Thrifty, I am insanely excited to have you!!