I was invited by Sondra from Sondra Lyn At Home to participate in this year’s ‘Home For the Holidays Blog Tour’! I am super excited to show you guys some super quick and easy options for simple gift wrapping.
And guess what, I didn’t have to tie any bows 😉
I haven’t used sacks in years, they used to be my go-to when my little’s were crawling, mainly because I thought wrapping took longer.
But now I have it down, especially when I follow one pictured below. And we can all admit, a pretty wrapped package is a little better than a sack….am I right?
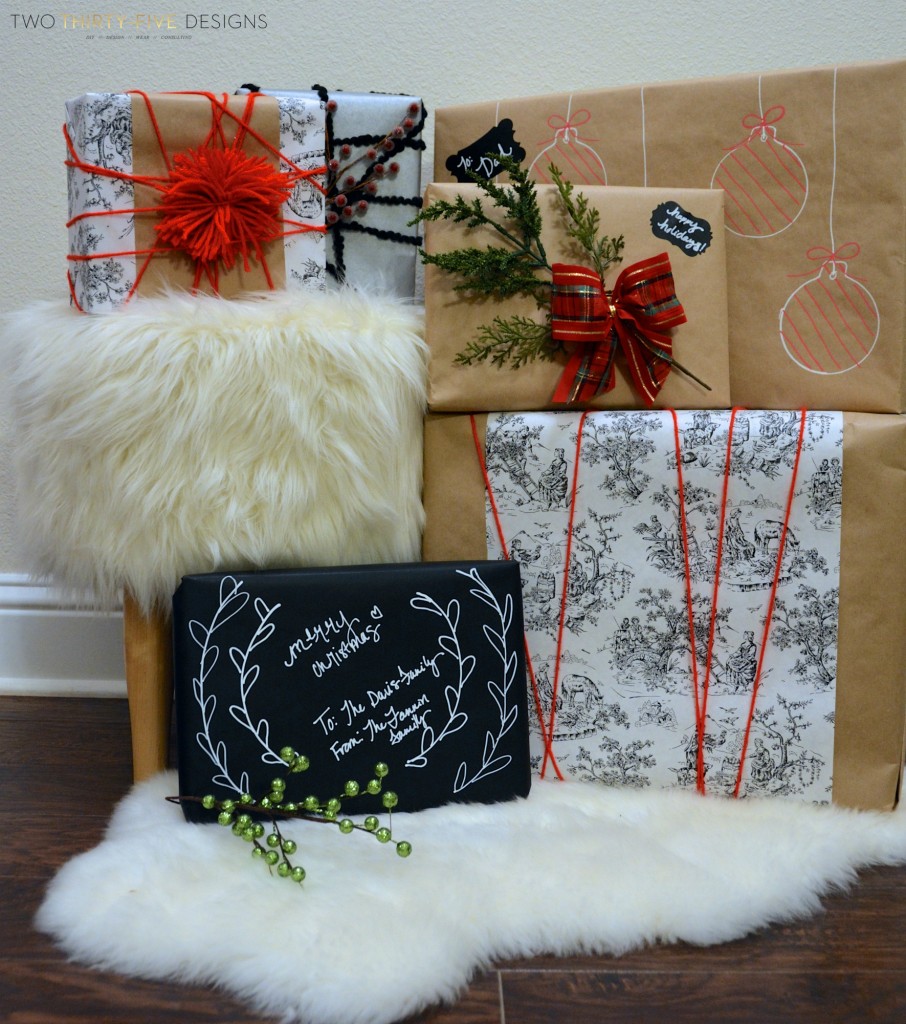
These all took just a few minutes each, and I reused the same items over and over.
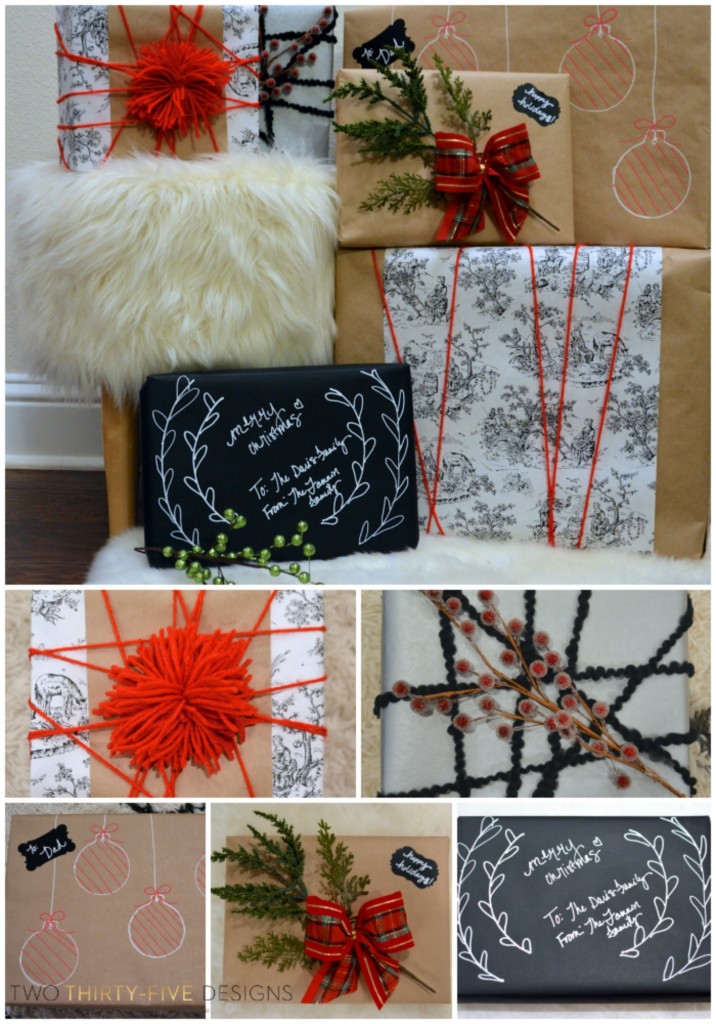
1. Wrap your packing in paper of choice.
Using a leftover piece, trim to fit, center and tape in the middle of the package.
Zig zag yarn across, tape into place, then top with a pom (tutorial here).
2. Wrap your package in paper of choice.
Zig zag yarn across, taping on backside into place.
Set berry’s on top and tape into place.
3. Wrap your package in paper of choice (I am a huge fan of plain paper).
Using a chalk pen, draw or trace round ornament.
Top with a simple bow and white string, running from top to ornament.
4. Wrap your package in paper of choice.
Using a small branch, trim to size and tape into place.
Cover tape with bow.
Plaid bows can be found here.
5. Wrap your package in paper of choice.
Using a chalk pen, free hand what your heart desires 😉
(See tutorial below)
My Easy Leaf Wreath Tutorial using a Chalk Pen
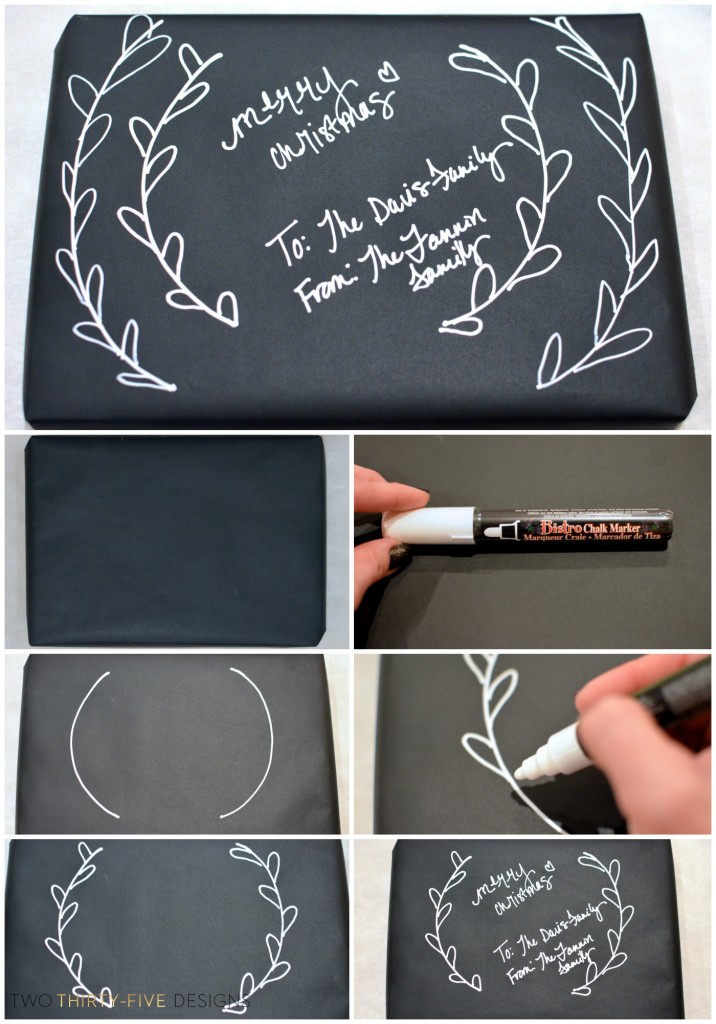
I had a friend recently introduce these to me.
Being one who’s skin rises uncontrollably and hears a ringing noise at just the thought of touching chalk (not even actually touching it), this quickly became my bff……foevs.
A liquid chalk marker y’all.
Where has this been all my life??
Trust me, I am not a freehand drawer gal, but this is insanely easy.
1. Wrap you package.
2. Bust out your Chalk Marker and jump up and down from the excitement follow the directions.
3. Draw out ‘parenthesis’, so to speak, on the box.
4. On each line, draw out half of heart on one side, then the other, moving down a space. Careful to let the chalk dry and not to drag your hand through it.
5. Bask in the glory that you drew a wreath.
6. Fill in the space.
And I went ahead and drew an outer wreath too.
You can seriously knock this out in just a few minutes and is great for those package you have to stack. No need of worrying about crushing a bow.
You can also seriously hop around and check out these other fabulous and talented ladies I have teamed up with for the blog tour!
Welcome to the first annual Home for the Holidays Blog Tour
brought to you by Sondra Lyn at Home!

This year’s co-host is Michele from Our Rosey Life. Thanks, Michele!
We are so excited to bring the selection of blogs that have been assembled for this inaugural kick-off. Be sure to check back for each day’s inspirational links!
Here is the line-up for the week:
Monday – Gifts and Wrapping
{Home-ology} Modern Vintage ~ Let’s Wrap Stuff ~ Tried & True
Two Purple Couches ~ Two Thirty-Five Designs
Tuesday – Trees and Decor- Part I
Atta Girl Says ~ Cottage at the Crossroads ~ Sondra Lyn at Home
Stone Gable ~ The Happier Homemaker
Wednesday – Crafts
365 Days of Crafts ~ Houseologie ~ Redhead Can Decorate
Thursday – Recipes and Tablescapes
Creative Southern Home ~ Domestically Speaking ~ Dukes and Duchesses
Major Hoff Takes a Wife ~ Our Rosey Life
Friday – Trees and Decor- Part II
Dandelion Patina ~ Decor Adventures ~ Designed Decor
What Meegan Makes ~ White Lace Cottage
Each day you will see new links added for that day’s featured topic. So let’s get started! Enjoy!!
Home for the Holidays
Monday ~ Gifts and Wrapping
Tuesday ~ Trees and Decor- Part I
Wednesday ~ Crafts
Thursday ~ Recipes and Tablescapes
Friday ~ Trees and Decor- Part II